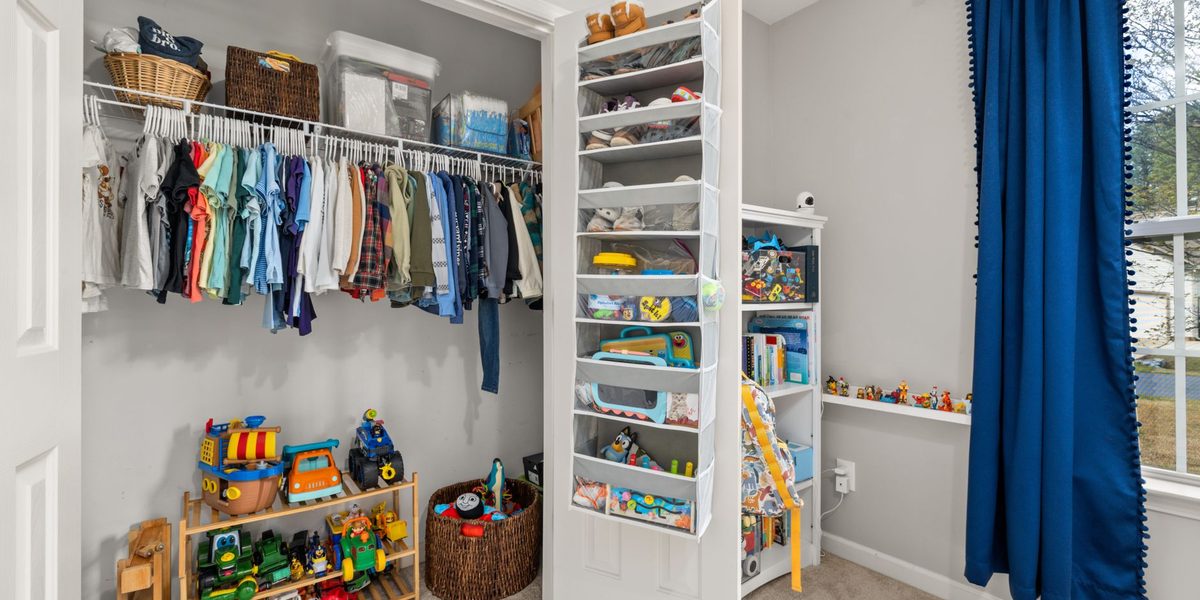
Few projects feel as satisfying as a decluttered home, and few feel as impossible to start. The trick that works for most people is refusing to tackle the whole house at once. When you commit to one room at a time, the job shrinks to something you can finish in an afternoon or a weekend, and every completed space becomes proof that the method works. This guide walks through a room-by-room approach that keeps momentum high, decisions simple, and backsliding to a minimum.
Why One Room at a Time Works
Decluttering fatigue is real. Decision-making is mentally expensive, and every item you touch demands a small verdict: keep, donate, toss, or relocate. Spread that effort across an entire house in one burst and you will burn out long before the garage is done. A single room, by contrast, has a visible finish line. You can see the before and after in the same day, and that quick win fuels the next session.
Working room by room also prevents the most common decluttering failure: piles in transit. When you try to sort everything everywhere, half-finished stacks migrate from the bedroom to the hallway to the dining table, and the house looks worse than when you started. Containing the chaos to one room keeps the rest of your home livable while you work.
Pick the Right Starting Room
Start where you will feel the result daily. For many people that is the bedroom, because waking up in a calm space sets the tone for everything else. Others prefer the entryway or the kitchen counter zone, since those areas greet you the moment you walk in. Avoid starting with the hardest space, such as a basement, attic, or garage packed with sentimental boxes. Those rooms demand emotional stamina you have not built yet.
A good rule: choose the room with the highest ratio of visual payoff to emotional difficulty. Bathrooms and linen closets are excellent warm-ups because almost nothing in them is sentimental. Expired products, threadbare towels, and hotel toiletries are easy verdicts, and the finished space looks dramatically better.
Set Up a Simple Sorting System
Before you touch anything, stage four containers or zones and stick to them for every room in the house:
- Keep: items that belong in this room and earn their space.
- Relocate: items you are keeping but that live somewhere else. They go in a single box, delivered at the end of the session, never piece by piece.
- Donate or sell: usable items you no longer need. Bag them and move them to your car the same day so the decision stays final.
- Trash and recycling: anything broken, expired, or beyond donating.
The relocate box is the secret weapon. Walking items to other rooms mid-session is how people get distracted and abandon the project. Everything stays put until the room is done.
Use Quick Decision Rules
Slow decisions are what make decluttering miserable, so borrow a few rules that speed things up. The first is the container rule: the space itself sets the limit. If the bookshelf holds forty books, you keep your forty favorites, and the shelf decides for you. The second is the one-year test for practical items: if you have not used it in a full cycle of seasons, it is a candidate to go. The third is the duplicate test, which is especially powerful in kitchens and bathrooms. You almost certainly do not need three vegetable peelers or five half-used bottles of the same lotion.
For sentimental items, give yourself permission to defer. Keep a single clearly labeled memory box per person, and when an item stalls you for more than a minute, it goes in the box to be revisited later. Decluttering sessions are for volume; curating memories is a separate, slower project.
A Realistic Room-by-Room Order
Once your warm-up room is done, a sensible sequence builds skill before difficulty. Move from the bathroom or linen closet to the bedroom and its closet, where the container rule does most of the work. Then take on the kitchen, which is high volume but low sentiment, followed by the living room, where surfaces and media tend to accumulate. Home offices and paper come next, because paperwork needs the decision stamina you have now developed. Save the garage, attic, and storage areas for last. By then you will have a practiced system, empty bins freed up from other rooms, and the confidence of a mostly finished house behind you.
Give each space an honest time estimate and then add half again. A bathroom might take two hours; a packed closet can take a full afternoon. Scheduling sessions on a calendar, like any other appointment, matters more than motivation.
Finish Each Room Completely
A room is not done when the sorting is done. Finish means the donate bags are in the car, the trash is out, the relocate box is empty, and everything in the keep pile has a defined home. That last step is what separates decluttering from reshuffling. An item with a home gets put away in seconds; an item without one becomes tomorrow's clutter.
Resist the urge to buy organizing products before you declutter. Bins and baskets purchased in advance tend to become clutter themselves. Declutter first, measure what remains, and only then shop for the few containers the space genuinely needs. Many homes discover they already own more storage than required once the excess is gone.
Keep the Clutter From Coming Back
Maintenance is lighter than the initial project, but it is not automatic. The one-in-one-out rule is the simplest guard: when a new shirt, mug, or toy arrives, a comparable item leaves. A small donation bin kept permanently in a closet makes the outflow effortless, and a quick ten-minute reset each evening, returning strays to their homes, prevents slow accumulation.
Watch the flat surfaces. Counters, dressers, and entry tables are clutter magnets, and keeping them mostly clear is the fastest way to make a whole house feel orderly. Finally, schedule a light seasonal pass through each room. Fifteen minutes per room, four times a year, is usually enough to keep the big project from ever needing a repeat.
Handle Paper, Photos, and Digital Spillover
Every room-by-room plan eventually collides with the categories that do not belong to any single room: paperwork, photographs, and the cables-and-chargers drawer. Treat these as their own mini-projects rather than letting them stall a room session. For paper, create three folders the moment you encounter a pile: act, file, and shred. Most household paper is neither urgent nor necessary, and a single banker's box of truly important documents, identification records, titles, warranties in use, covers the needs of most families. Everything else can usually go, especially statements and manuals that exist online.
Photographs deserve the memory-box treatment: gather them into one labeled container as you find them and curate later, on a quiet evening, not mid-declutter. For the electronics drawer, match every cable and charger to a device you still own; orphaned cords are among the easiest discards in the entire house once you realize the device they served left years ago. Handling these floating categories with the same calm, rules-based approach keeps them from becoming the loose thread that unravels an otherwise finished room.
Final Thoughts
Decluttering a whole home is not one heroic weekend; it is a series of small, finishable victories. Choose an easy first room, run every item through the same four-way sort, finish each space completely, and protect your progress with a few simple habits. Within a season you will have touched every room in the house, and the home that remains will hold only the things you actually use and love.